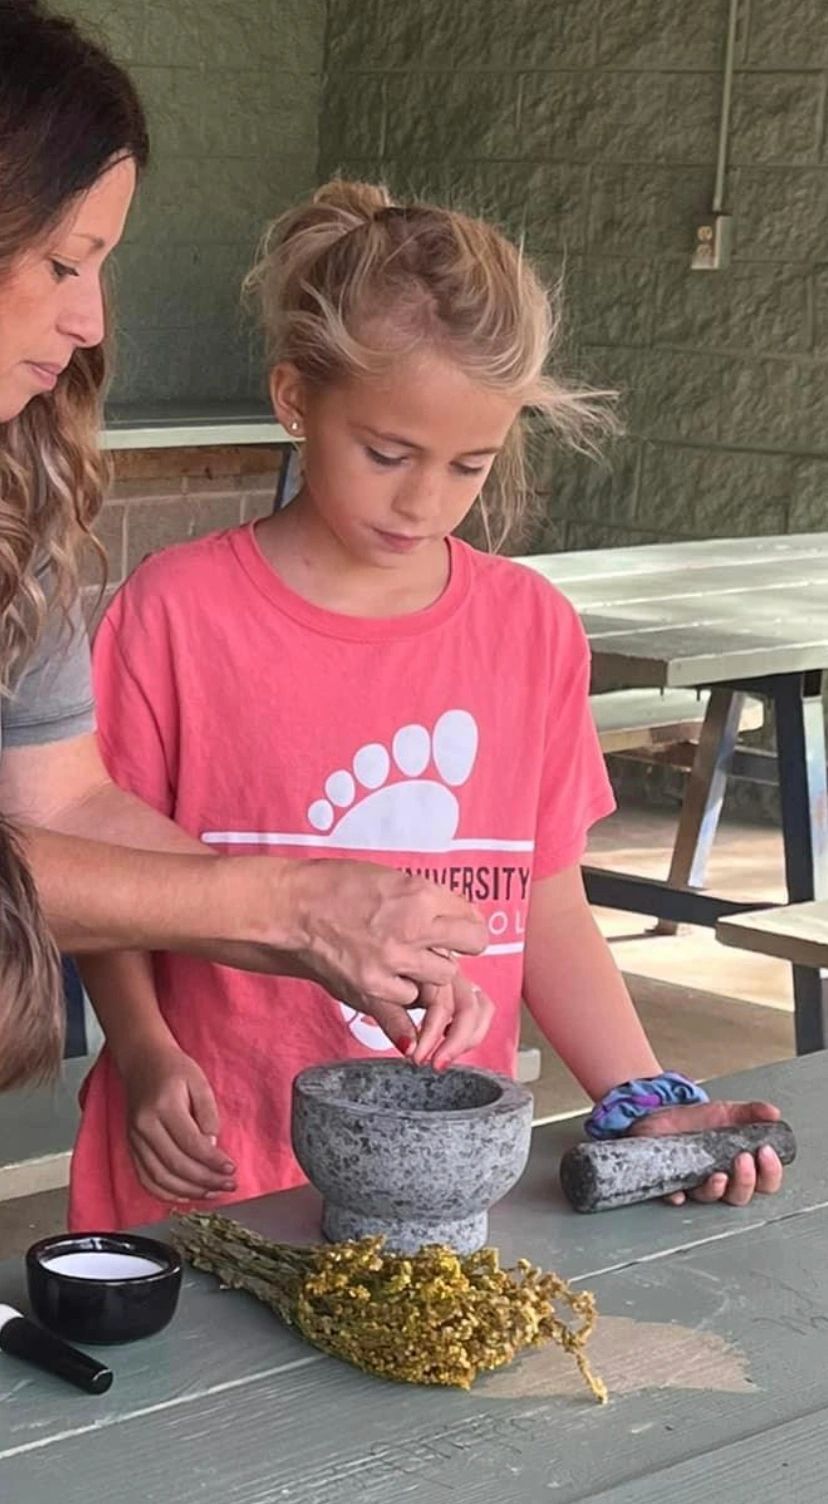
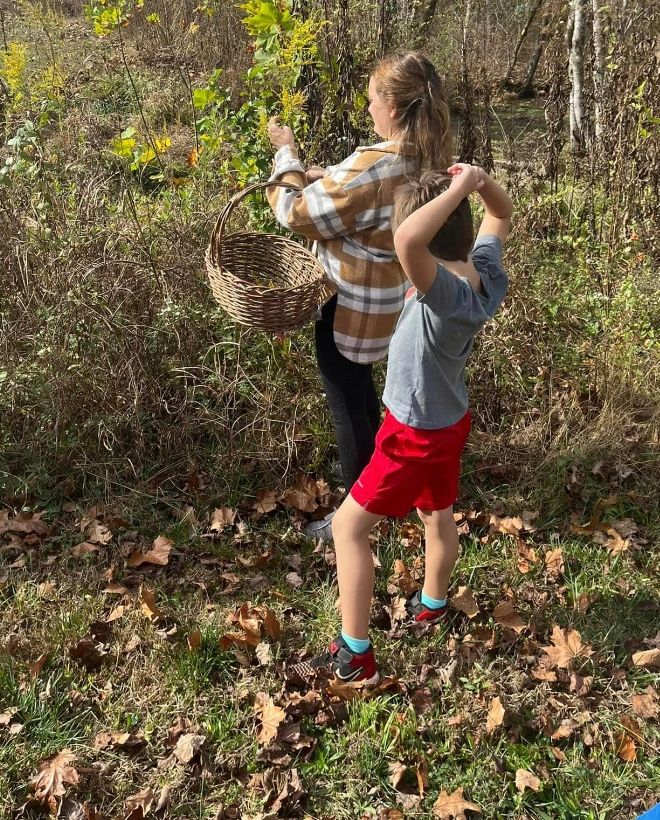
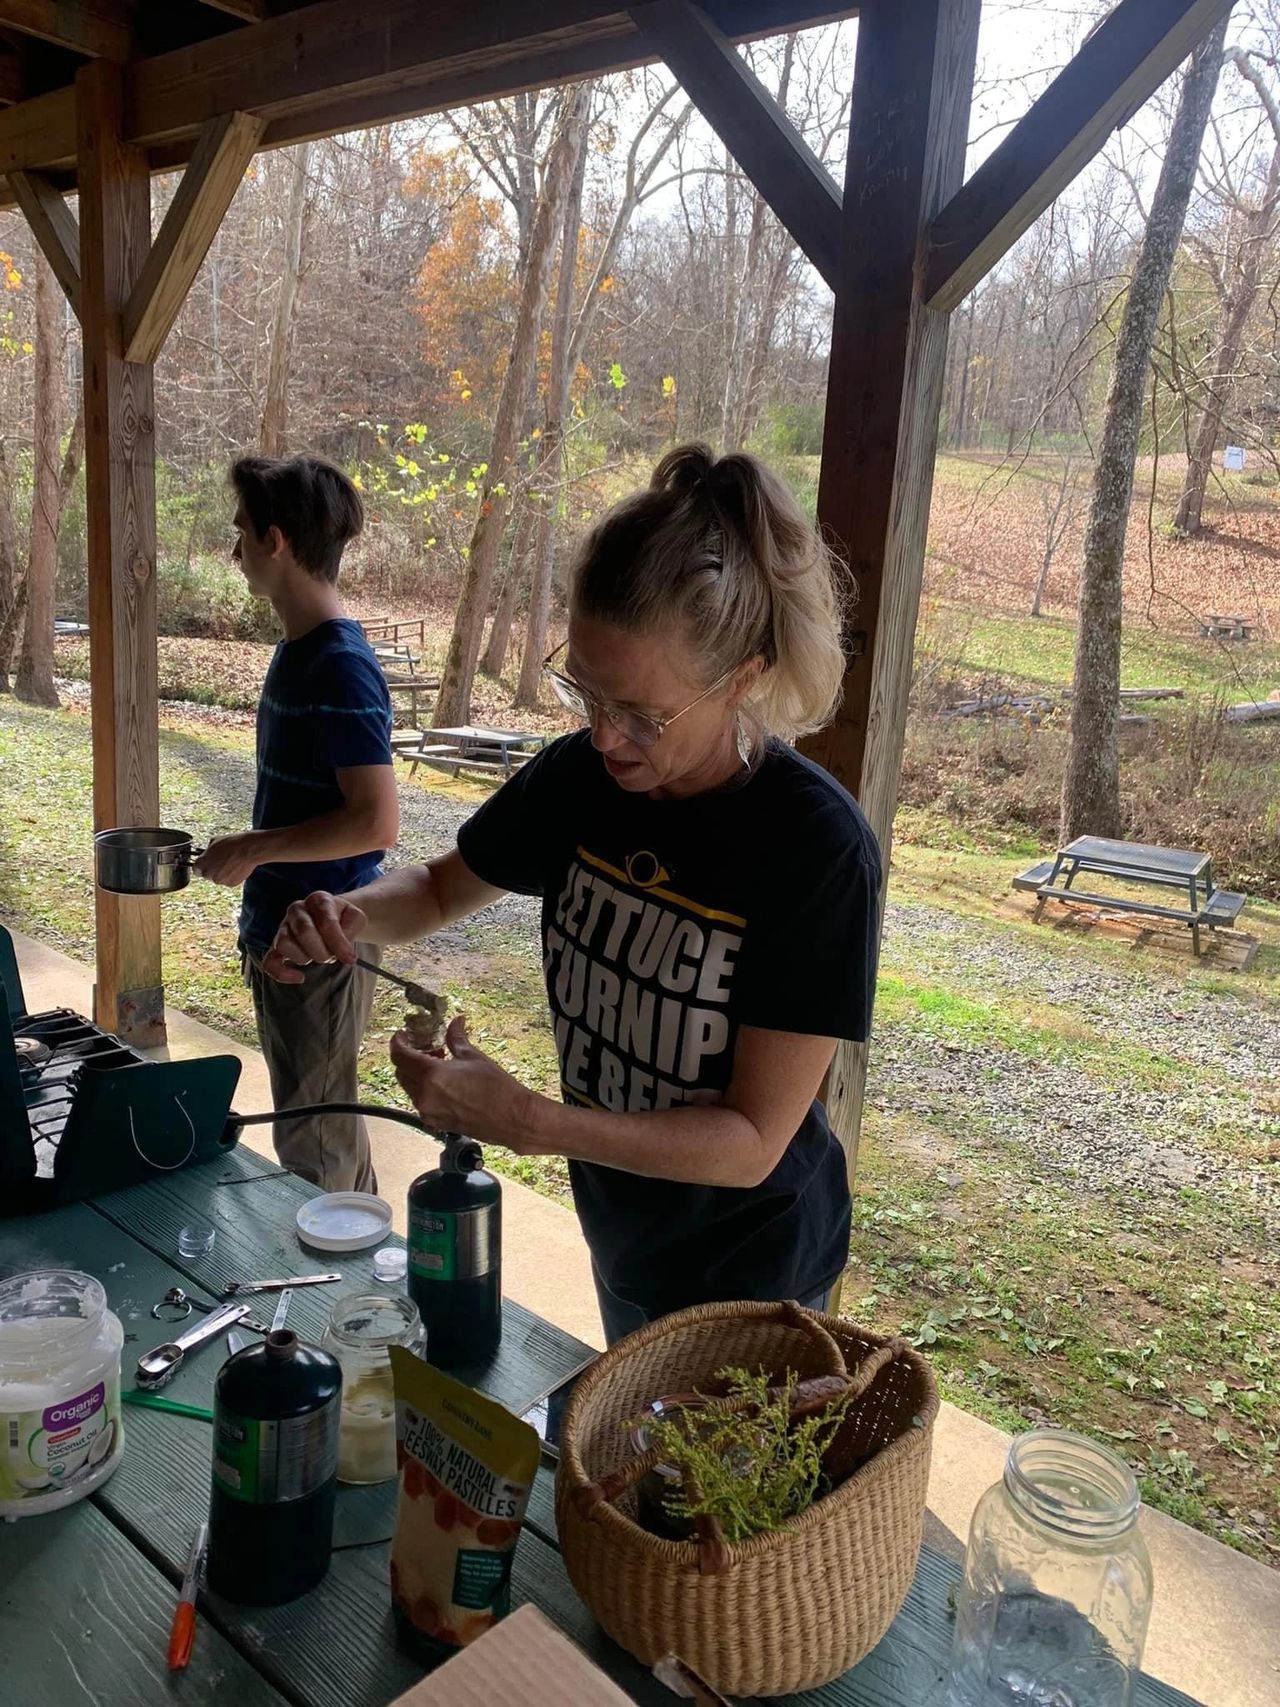
When we were learning about trail safety during cycle one this year, a few of our weekly activities were centered around first aid. Since we meet outdoors – our group decided to take this practical skill a step further to explore how we can use nature itself when doing first aid. So, we hosted a “Nature’s Medicine Class.” The kids found herbs at our park and we used them to make some different items that they added to their BU first aid kits. It was so fun to hike with the purpose of looking for medicine. The kids made everything themselves – so that should tell you, anyone can do it!
Natures medicine is using what you have in our natural world for healing or treating your body when it needs it. It’s foraging, herbalism, and being a good steward of our land all in one. I remember when I started getting into herbs. I would walk and just be so amazed that all these “weeds” had an unknowingly, spectacular purpose. Before that, they were just troublesome plants that people need to get rid of. It was like finding gold each time I found something new and discovered how I could use it to heal my family.
One of the many reasons I love using herbs to treat different ailments is because it’s free! We are outside all the time anyway so it never takes any extra effort or costs anything. Plus, the opportunities are endless – you can find a plant to treat almost anything that might come upon you – and the best part is it works!
I hear what you’re saying, “there’s thousands of plants, I wouldn’t even know what to use, where do I start?” I always say the quickest way to learn is to do. So, get outside, hit the trails and start identifying plants. Just look for something that interests you and use a plant ID app like “iNaturalist” I love this app because it will identify the plant – but it also records the coordinates of where you found the plant. So if you see something you’re not sure of, go home to research it. Then if you find out it’s something great for your medicine cabinet, you can go right back to it. Once you come across the same thing a few times, you’ll begin to easily recognize it. Keep doing that until you’ve got a good variety of plants that you are comfortable using.
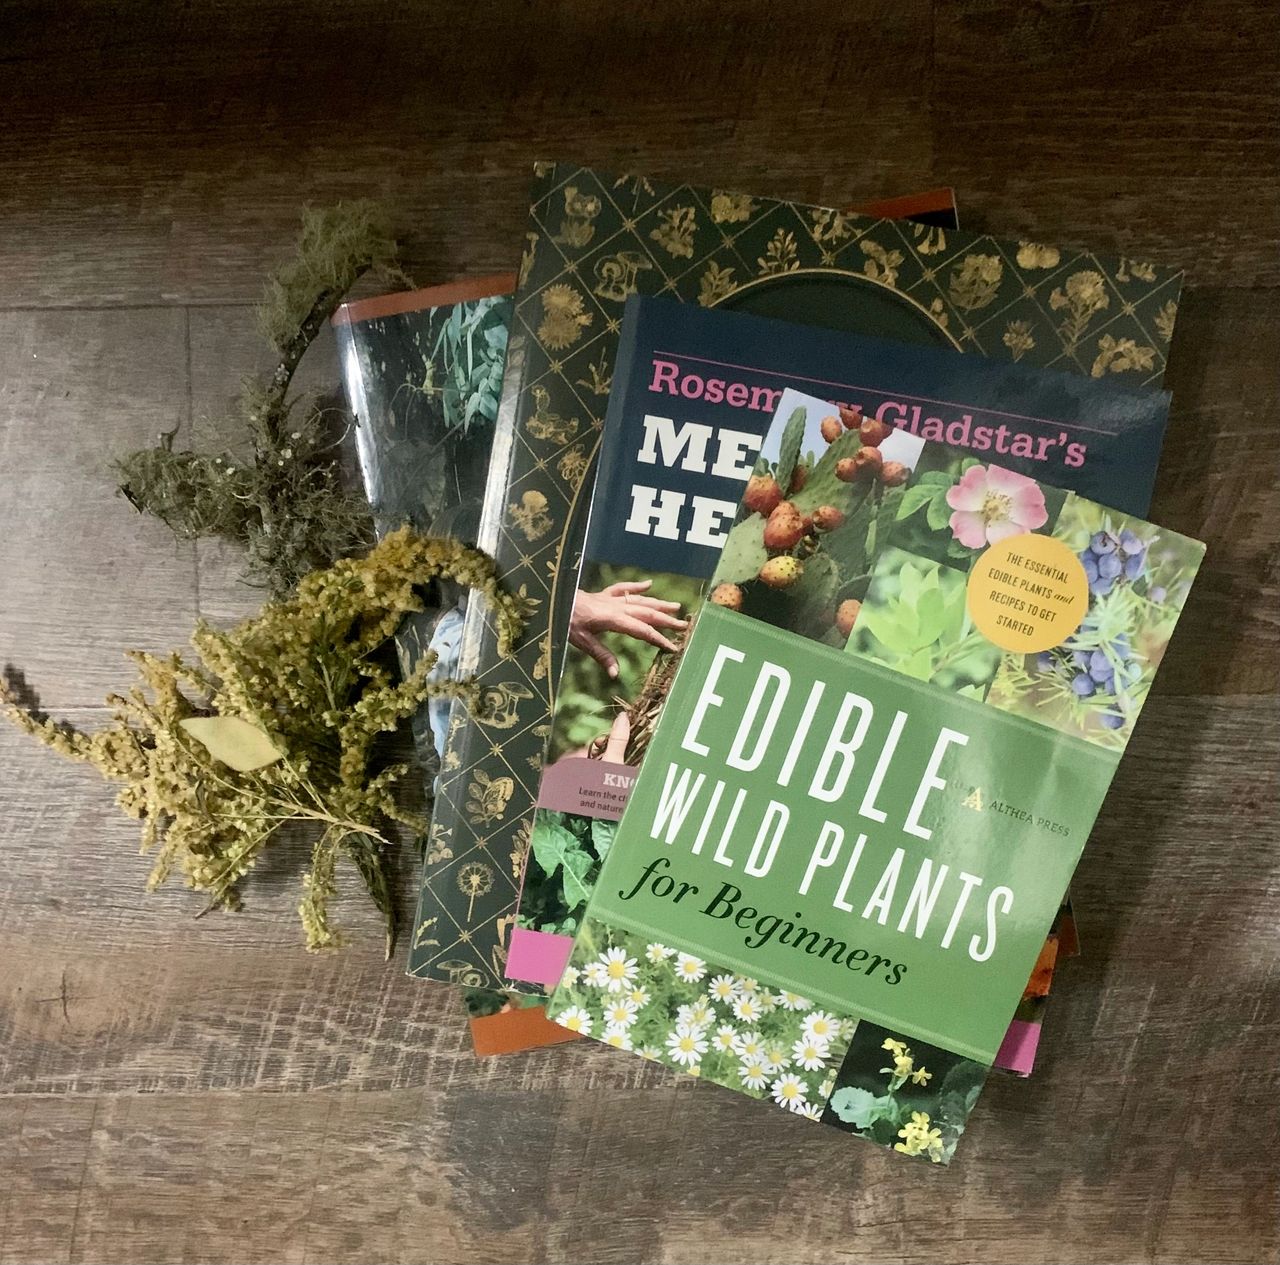
There’s several great beginner books for herbs too that I’ve recommended over and over again. “Rosemary Gladstar’s Medicinal Herbs, a Beginners Guide,” “The Lost Book of Herbal Remedies,” by Nicole Apelian, & Claude Davis, “Edible, Wild Plants for Beginners” by Althea Press, and “The Herbal Medicine-Maker’s Handbook: A Home Manual” by James Green are all great beginner books. No matter where you live, they will have easily recognized and common plants you can forage for use.
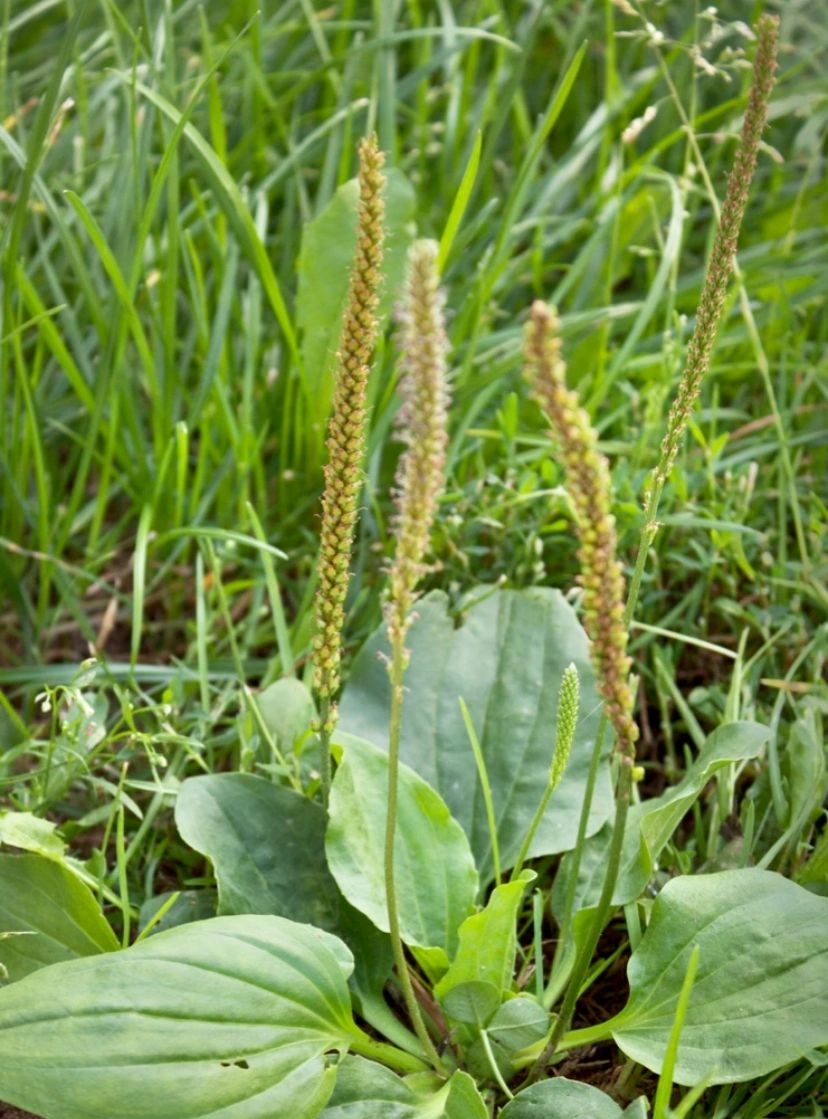
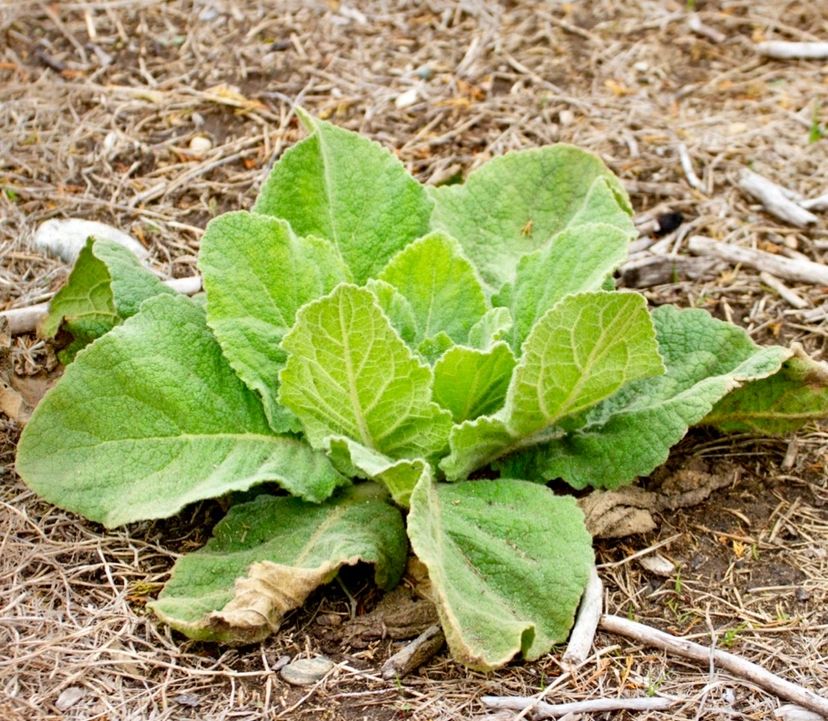
One of my favorite herbs (and a great beginner one I always suggest) is plantain. Not the cousin of the banana – the weed! It’s everywhere, easy to identify, and works quick. When one of my kids gets an bite or sting they immediately rush off to see if they can locate it. Very few people give plantain the credit it deserves. It’s anti-inflammatory, antimicrobial, analgesic, astringent, antihistamine, high in iron, and vitamins C and K. It acts as an antihistamine to relive the pain and itch of the bite and can even draw out toxins. When you’re on the trail, you can pick it and chew it up and put it right on your skin. Chewing it releases all the good stuff and you use it like a poultice. Native Americans and other primitive cultures all over the world have used this method. Our favorite way to use plantain though is by harvesting it to make a plantain oil. Once the oil is made, you can use it just like that, in a roller ball (my kids both have these in their first aid kit). Or you can use the oil to mix into a plantain salve. Keep reading for recipes.
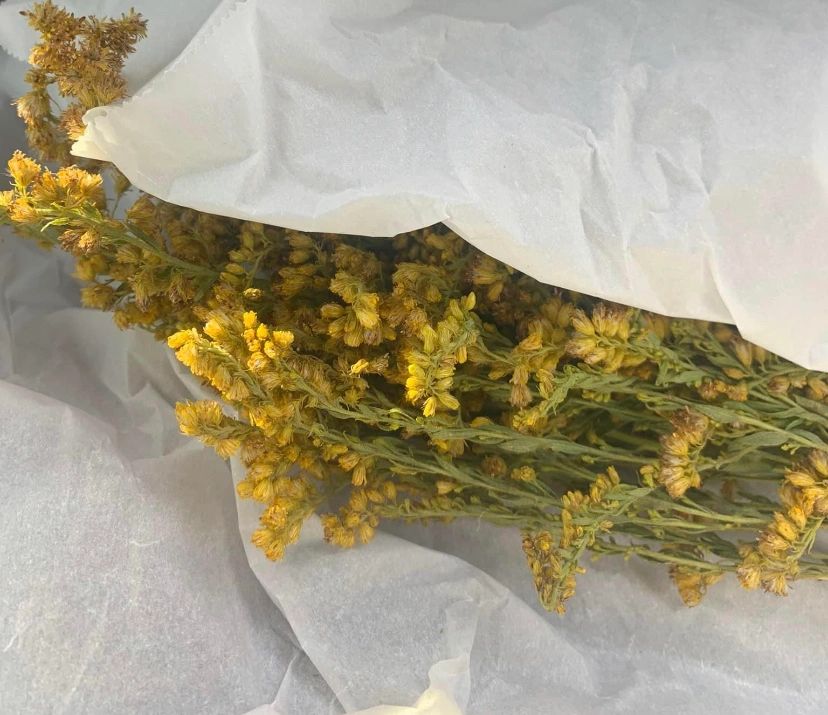
Another really common and versatile herb is golden rod. Golden Rod is that pretty, almost feathery looking yellow flower you see blooming from late summer into fall. It can be used as a tea or tincture to treat an UTI as a tea, or aches and sprains as an oil, or allergies, colds, and flu in the tincture form.
Mullein is another one that is common where we live. My kids also take pleasure in foraging for this in the summer. We have tinctures and tea bags ready to should someone get a respiratory infection. It’s flowers, roots, and leaves are all valuable medicine.
“But how do you make tinctures and teas and salves and oils?”, you might be asking. It’s really so much simpler than you think! I promise, just do it and you’ll see. The most important thing to note is that when you’re foraging plants, do so responsibly. Only take what you need, make sure you’re allowed to forage in the area you’re in, and make sure that the plant hasn’t been sprayed with any chemicals.

Now that you’re out finding plants, it’s time to do something with them. There are so many recipes online and some will suggest fresh herbs, other dry. Here’s the cute drying rack we use for our herbs if you find a recipe that calls for dried ones.
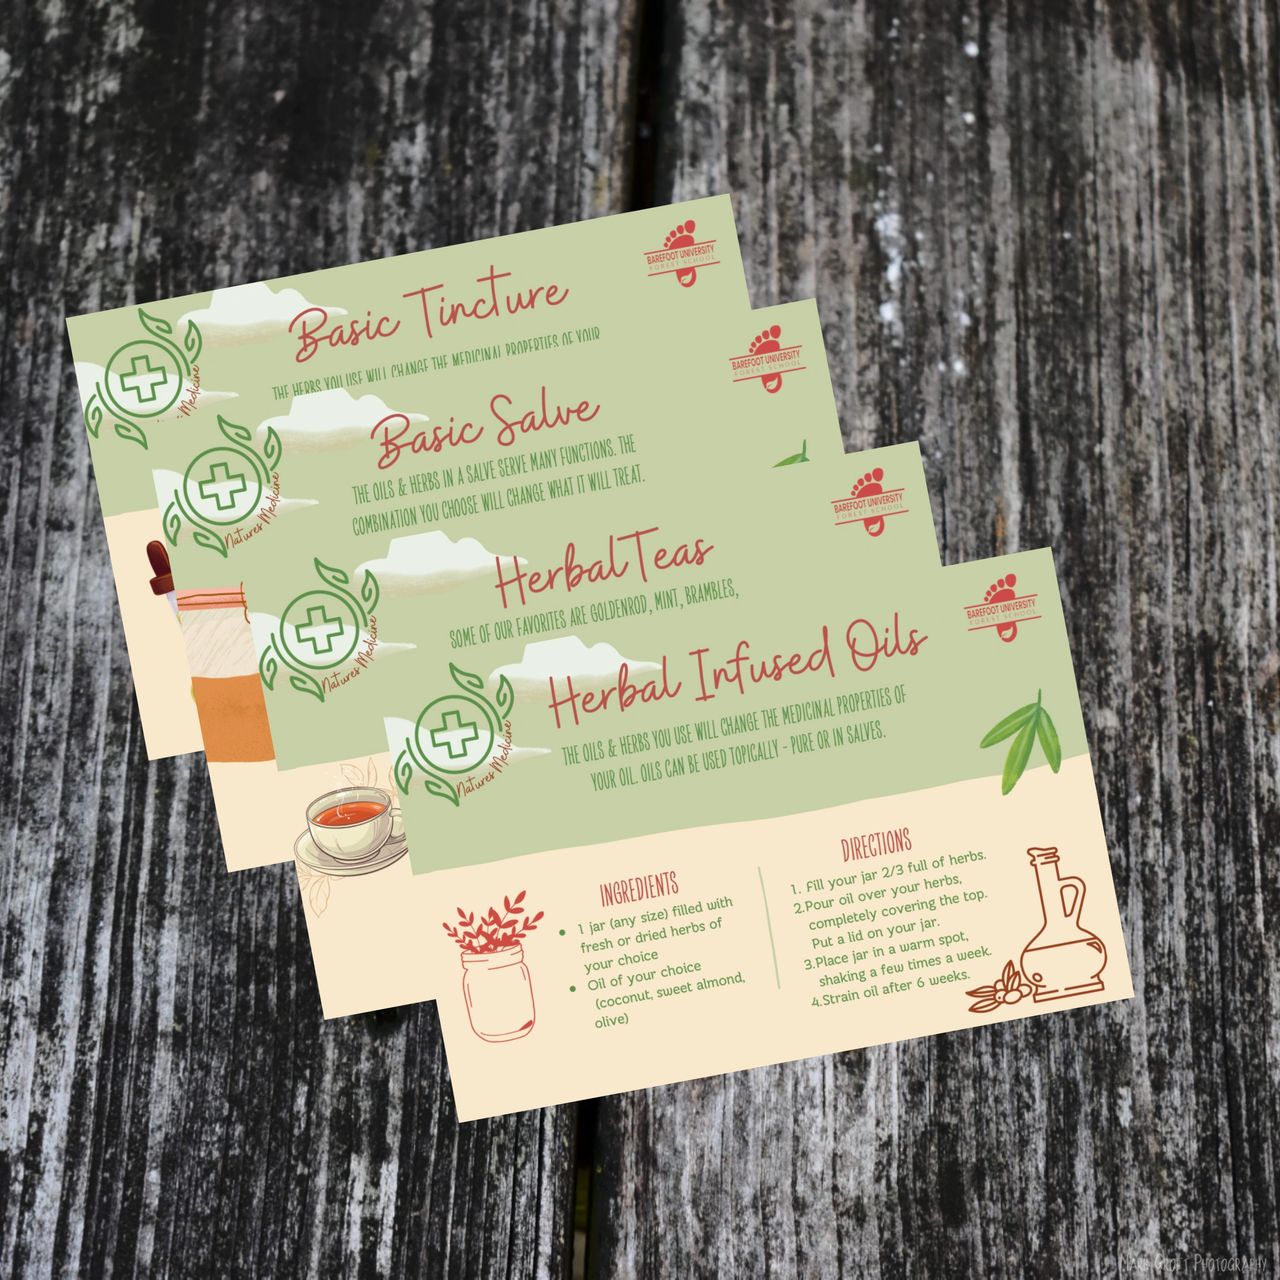
Now for the fun part, making some medicine. You can download our nature medicine recipe cards at the end of the post. Here’s the basic recipes we used that can get you started.
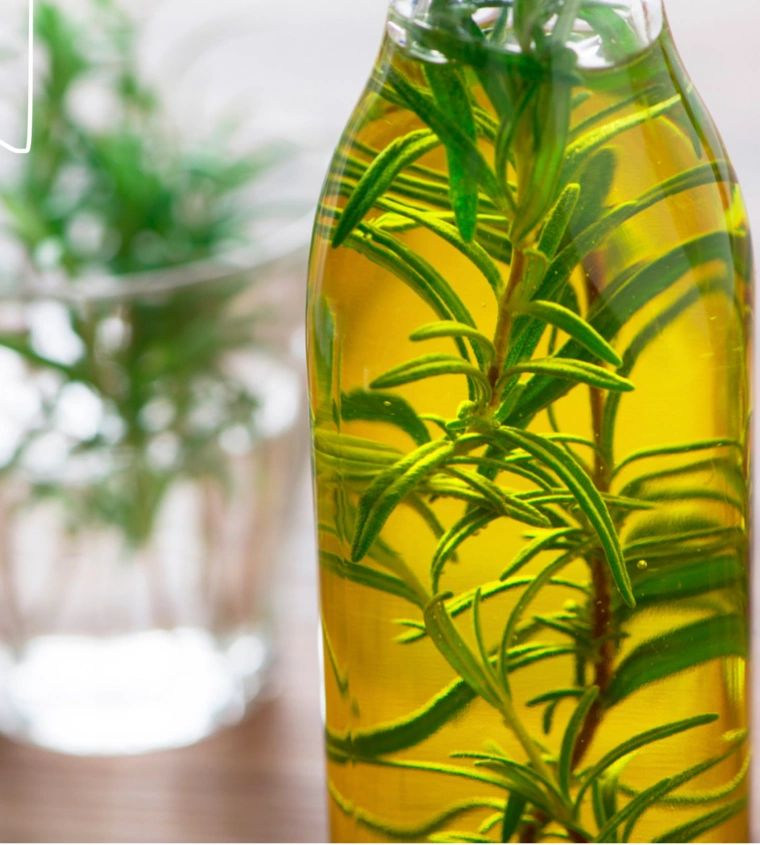
Herbal Oil: Herbal oils, also known as an extraction are great for internal or external use. It is important that your herbs are either dried or that, when fresh, the liquid in the herbs mixes well with oil so it doesn’t spoil.
Fill a jar 2/3 full of fresh herbs and cover with your favorite oil. We love to use organic, cold pressed olive oil. It’s more cost effective than some other oils and works great because it’s naturally healing to the skin. It also contains many minerals and vitamins, including A, D, E, and K. Let the herbs and oil sit in a warm spot for at least six weeks. Shake it daily. After six weeks, strain the oil to use.
Basic Salve: Salves work great with the oil soluble medicinal properties of the herbs, because we have a multi-versatile product. There’s so many recipes online for herbal salves.
The best base in my opinion is olive oil and beeswax. Olive oil supplies the medium for the medicinal properties to be placed in and beeswax provides the hardening agent to the salve. Other types of oils are used by people but for all the reasons above, I prefer olive oil. It is also high in monounsaturated fats giving it good shelf life.
Beeswax, which is most commonly used as the hardening agent for the base, is available in different forms. Generally you can get it white (bleached) or brown (unbleached). I suggest the brown – unbleached, its natural state and not chemically altered. It also still contains naturally occurring medicinal ingredients such as propolis. Use dried herbs. Fresh herbs can be used, but since they contain water, this can encourage mold and bacterial growth.
The basic recipe is 4 oz of oils, 1 oz of beeswax, and 2 tsp of dried herbs. Optionally you can add 20 drops of vitamin E oil and/or 8-10 drops of EO. You just combine everything except the herbs and EO into a double broiler. Heat until it is melted, stirring the whole time. Remove from the heat and ad your herbs and EOs. Then just pour it in your container.
Tinctures: Tinctures are a fluid extract of herbs. Alcohol, apple cider vinegar, or glycerin can be used when making a tincture. Vodka, by law, can only be grain alcohol and water: this is the reason why it is the choice of most herbalists. It is obviously a very safe alcohol also, because it is specifically designed for human consumption. Whiskey and gins are sometimes used but often can contain other additives. I exclusively use vodka. Tinctures will last many years when they’re made with alcohol. Also, they’re absorbed very quickly so they work faster.
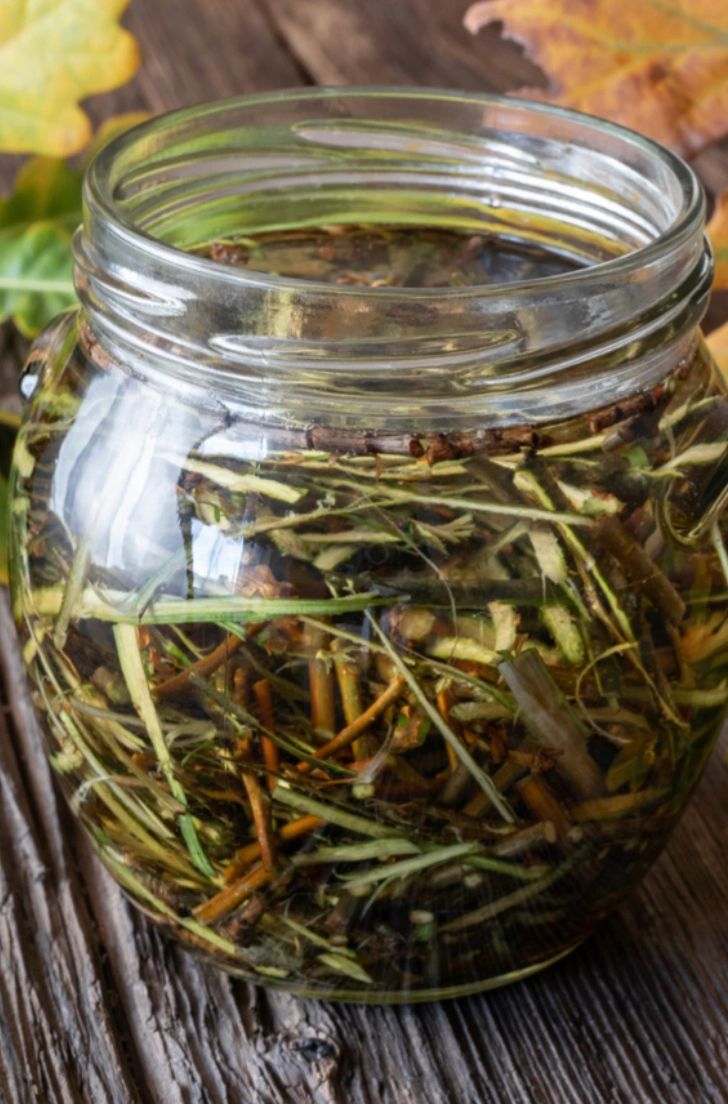
You can use fresh or dried herbs for almost every tincture. Fill a mason jar 2/3 of the way full of your herbs, root, or bark. Cover what’s in your jar with 100 proof vodka and place a lid tightly over it. Shake it up to make sure the alcohol is covering everything and the herbs aren’t sticking together. Keep it in a dark spot for a whole moon cycle – at least four weeks. Shake it daily; or more often as you think about it. When the four weeks are up; strain the liquid into a clean jar and tada – you have a tincture. Don’t forget to label it!
A standard suggested adult dose of tinctures is two dropper fulls (or 60 drops) 2-3x a day. (Fun fact, two dropper fulls equal one 8oz cup of tea!) For kids, there’s two well known rules for calculating their dosage. Young’s rule – add 12 to the child’s age, then divide the child’s age by this total. Example: dosage for a 4 year old: 4 divided by 16 (4+12) = .25, or 1/4 of the adult dosage. Cowling’s Rule – Divide the number of the child’s next birthday by 24. Example: dosage for a child who is 3, turning 4 would be: 4 divided by 24 = .16, or 1/6 of the adult dosage.
Teas: When you hear someone say “herbal infusion,” they’re talking about tea. It can be made with boiling or cold water or even in the sun, making it fun in itself.
If I’m storing herbs in tea bags, I always use dried herbs. You can order teabags online. Just fill the bags with 1tsp of the herbs once they’re dried and store them like you would any other tea. The usual adult dosage of tea is an 8oz cup. For kids, you can use the above rules from Young or Cowling.
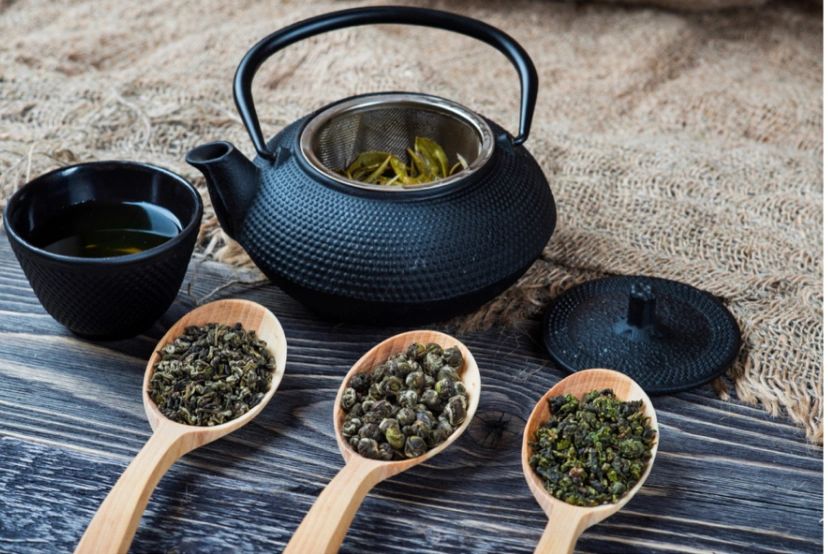
You can use fresh herbs right away for tea. A general recipe is to use two teaspoonfuls per cup of water. Pour boiling water into a cup with the herbs (a tea ball may be used), cover, and steep for 15-30 minutes. When making a cold infusion or sun tea you can also use fresh herbs. We let the herbs remain in the water 1 to 4 hours before straining. Or sometimes overnight in the fridge. We use cold infusions with herb parts that the medicinal qualities are easy to extract, such as leaves and flowers. If we boil the more sensitive parts of the plant, you lose a lot of the medicinal value.
Even if you make a preparation the same exact way each time, you can’t rely on the herbal medicinal properties being in the same quantity from one bunch of herbs to another. So amazing and wonderful! This is nature’s beautiful way of adjusting the chemical properties of herbs from season to season, but also the to the local area for the local people.
Now that you know how to get started, there’s no excuse not to. It feels so good to take control of your families health. And when you can get tuned in to nature while doing it, it’s even better. Don’t forget to download your nature’s medicine recipe cards!
Amber
Barefoot University is a participant in the Amazon Services LLC Associates Program, an affiliate advertising program designed to provide a means for sites to earn advertising fees by advertising and linking to Amazon.com.